
Table of Contents
- How to Prepare for a Home Inspection: What Actually Matters
- Pre-Inspection Prep: Access, Utilities, and Safety
- Home Inspection Checklist for Sellers: Room-by-Room
- Common Home Inspection Repairs and Red-Flag Fixes
- How Long Does a Home Inspection Take?
- Virtual Inspections and Pet Management
- After the Inspection: Negotiation and Next Steps
- Frequently Asked Questions
Last Updated: October 4, 2026
How to Prepare for a Home Inspection: What Actually Matters
Learning how to prepare for home inspection day comes down to one idea: make the house easy to evaluate. A home inspection is a professional, non-invasive visual review of a property’s condition, covering the roof, structure, electrical panel, plumbing, HVAC, and more.
That matters in a market where surprises kill deals. A qualified inspector needs room to work, working utilities, and clear access to mechanical systems.
Preparation is not about hiding problems. It is about removing obstacles so the inspector can see the whole house and document its true condition.
Pre-Inspection Prep: Access, Utilities, and Safety
The biggest delays on inspection day are locked doors, blocked panels, and shut-off utilities. Handle these three items first, and the visit runs on schedule.
Clear Access to Mechanical Systems and Electrical Panels
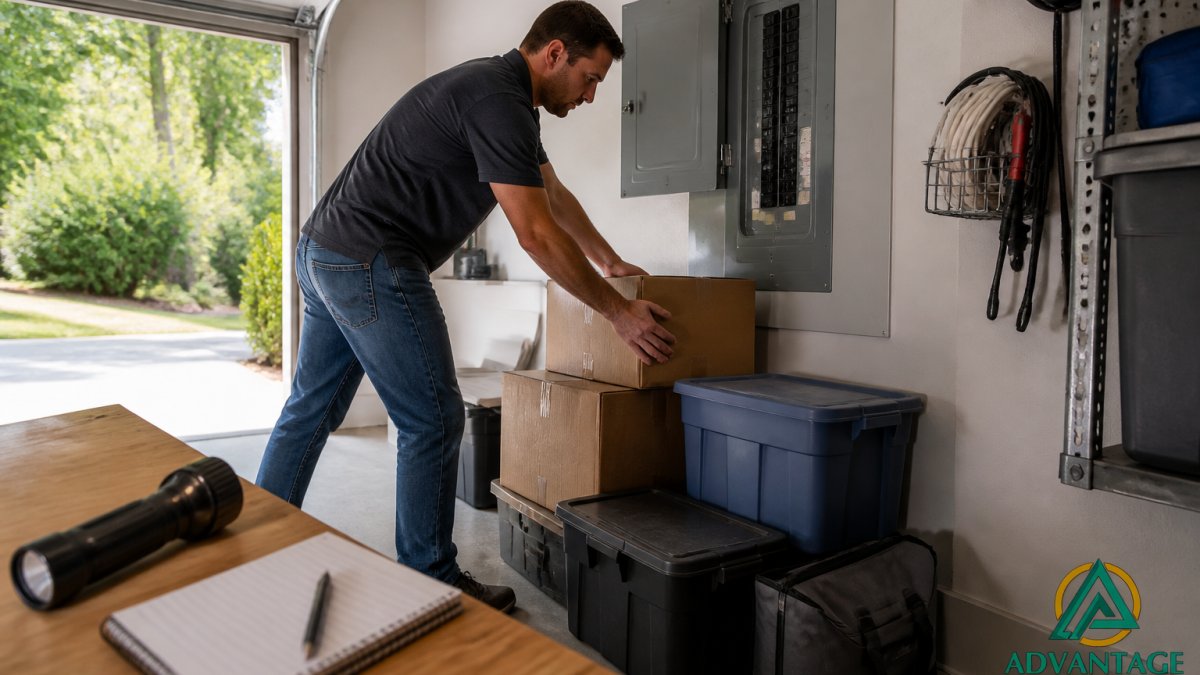
An inspector cannot evaluate what they cannot reach. Clear a working zone of about three feet around the furnace, water heater, and electrical panel.
- Remove boxes, bikes, and shelving from the panel area
- Unlock gates, crawl space doors, and attic access
- Trim shrubs away from the exterior HVAC unit
- Label the breaker panel if any circuits are unmarked
Utility Connections and Pilot Lights
Every system needs power, water, or gas to be tested. Confirm the following before the inspector arrives:
- Gas and water service turned on
- Pilot lights lit on gas water heaters and furnaces
- All breakers switched on, including the main
- Sinks, toilets, and tubs free of standing water
A common mistake is scheduling the inspection before utilities transfer. Inspectors charge for return trips, so confirm service is active the day before.
Home Inspection Checklist for Sellers: Room-by-Room
Use this home inspection checklist for sellers to walk the property the weekend before your appointment. The goal is not perfection. It is removing small annoyances that clutter a report and invite repair requests. Work top to bottom, inside out, and give yourself a full day.
| Area | What to Check | Why It Matters |
|---|---|---|
| Interior rooms | Doors latch, windows open and lock, bulbs working | Shows functional testing passed |
| Exterior | Gutters clear, grading slopes away, curb appeal tidy | Prevents drainage and moisture flags |
| Mechanical | Filters changed, panels clear, utilities on | Confirms systems can be tested |
| Storage | Attic and basement paths cleared | Gives access for structural review |
Interior: Doors, Windows, and Light Fixtures
Test every door and window yourself. Open and close each one, then check the locks. Replace burned-out bulbs in light fixtures, including closets and hallways. A dead bulb reads as an electrical question, and that question lands in the report.
Go beyond the obvious. Inspectors test the mechanisms buyers actually use:
- Run every window through a full open-close-lock cycle. Sticking sashes and broken sash cords show up as window defects.
- Check that sliding doors stay on their tracks and that screen doors latch.
- Open and close every interior door, including closets. A door that rubs the frame suggests settling.
- Test the garage door with both the wall switch and the remote, and confirm the safety reverse works when you wave an object under it.
- Run the garbage disposal, the dishwasher, and the range hood. Appliances that hum but do not drain or vent get flagged.
- Look under every sink for slow drips and around the base of each toilet for soft flooring.
Also run every faucet and flush every toilet. Watch for slow drains or running tanks. These are cheap fixes now and negotiating chips later. A running toilet is usually a worn flapper, a part that costs a few dollars at any hardware store.
Exterior: Curb Appeal and Drainage
Walk the perimeter with fresh eyes. Clear gutters, pull debris from downspouts, and check that the ground slopes away from the foundation. Poor exterior drainage is one of the most common findings we document, and it points straight at the foundation.
Concrete exterior checks that pay off:
- Confirm downspouts discharge at least several feet from the foundation, not directly against it.
- Look for soil that has settled into a low spot against the foundation wall. Add soil to restore the slope.
- Check the roof from the ground with binoculars. Missing shingles, curling edges, and exposed nail heads are visible without climbing.
- Inspect exterior outlets and hose bibs for cracked covers and loose mounting.
- Look at the siding and trim for soft spots, peeling paint, and gaps where water can enter.
- Clear the dryer vent and make sure the exterior flap opens freely.
Curb appeal counts too. Trimmed landscaping and a tidy entry signal a maintained home, and buyers read the report through that lens. Cut back any shrub or tree limb within a few feet of the roof or siding, since vegetation holding moisture against the house is a recurring finding.
Mechanical, Storage, and the Small Stuff
The mechanical and storage areas are where preparation saves the most time. Confirm the furnace filter is new, the water heater is accessible, and the attic and crawl space hatches open without moving furniture. Label the breaker panel if any circuits are unmarked, and note the age of major systems so you can answer questions instead of guessing.
Photograph anything you fix before and after. A dated photo of a repaired leak or a replaced outlet cover is a clean answer if a buyer’s agent questions the item later.
Common Home Inspection Repairs and Red-Flag Fixes
Fix the red flags before they reach the report. Common home inspection repairs that spook buyers include active water stains, exposed wiring, missing outlet covers, and cracked heat exchangers. Some are quick DIY fixes. Others need a licensed trade, and that is fine. Documentation of a professional repair is just as valuable as the fix itself.
Work through this priority list:
- Repair active leaks under sinks and around water heaters
- Replace missing outlet and switch covers
- Re-caulk tubs, showers, and exterior penetrations
- Service the HVAC and swap the furnace filter
- Test smoke detectors and carbon monoxide detectors, then replace batteries
Never paint over or hide a water stain or crack. A qualified inspector will find it, and a concealed defect damages trust far more than the defect itself.
How Long Does a Home Inspection Take?
A typical home inspection takes two to three hours, depending on the size, age, and condition of the house. Larger homes, crawl spaces, and multiple HVAC systems add time. Radon testing and a sewer scope extend the visit further because they run on their own schedules.
Plan for these logistics:
- Block a half day, not an hour
- Expect the inspector to arrive with tools and ladders
- Ask when the report will be delivered, usually within a day or two
Sellers should leave during the inspection. Buyers should attend if they can. Walking the house with the inspector is the fastest way to understand the report later.
Virtual Inspections and Pet Management
Two details trip up otherwise smooth appointments: remote buyers and anxious pets. Both have simple answers.
For virtual or remote inspection prep, ask the inspector about photo and video documentation in advance. Confirm a strong phone signal at the property and share gate codes or lockbox details ahead of time. A walkthrough video call works well for out-of-state buyers who cannot attend.
Pet management during inspection matters more than people expect. Even friendly dogs get stressed when strangers open closets and test alarms.
- Secure pets in a crate or take them off site
- Put away food and water bowls in testing areas
- Tell the inspector about any pet that stays home
If you cannot remove a pet, leave a note on the front door naming the animal, its temperament, and where it is secured. Inspectors appreciate the heads-up, and it prevents a startled animal from blocking attic or crawl space access.
After the Inspection: Negotiation and Next Steps
The report is a tool, not a verdict. Most guides stop at the inspection itself, but the real leverage comes from how you handle the findings. Read the full report, then sort every item into three buckets: safety issues, active defects, and maintenance notes. Safety items and active water intrusion are the strongest grounds for repair requests. Cosmetic wear rarely is.
How to Read the Report Like a Negotiator
Inspectors write in plain language, but the report is not a repair list. It is a condition snapshot. Learn the difference between a defect and a recommendation:
- Defect: Something is broken, unsafe, or not functioning. These carry weight.
- Recommendation: The inspector suggests further evaluation by a specialist. This is a question, not a demand.
- Maintenance note: Normal upkeep for an older home. Buyers who push on these often lose credibility.
A common pattern is that buyers submit a long list of every line item and sellers reject the whole thing. A tighter list of five to eight genuine issues moves the conversation forward.
The Three Ways to Resolve Findings
Once you agree on what matters, there are three standard resolutions, and each has trade-offs:
- Seller makes the repair. Best for safety items and anything requiring a permit. The seller controls the contractor and the timeline, and the buyer gets a documented fix.
- Seller credits the buyer at closing. The buyer handles the work after closing. This is faster and avoids scheduling conflicts, but the credit is negotiated in dollars and the buyer may pocket it without repairing anything.
- Price reduction. The sales price drops by the estimated repair cost. This lowers the buyer’s loan amount and monthly payment, but it also lowers the seller’s net and can complicate appraisal if the reduction is large.
Get contractor quotes for the big items before you respond. A documented estimate carries far more weight than a round number pulled from the air. For a roof, HVAC, or foundation item, a written bid from a licensed contractor is the strongest evidence you can bring to the table.
Deadlines and Contingencies
The inspection period is a contractual deadline, not a suggestion. Most purchase agreements set a specific number of days for the buyer to complete inspections and respond. Miss it and you may lose the right to negotiate or walk away.
- Know the exact date your inspection contingency expires.
- Submit any repair request in writing before that date.
- If you and the seller cannot agree, the contingency usually lets the buyer terminate and recover the earnest money.
For buyers, the inspection period is your window to gather information. For sellers, a pre-listing inspection flips the script: you find the issues first, fix them on your timeline, and list with confidence.
Sellers who want to control the narrative before listing, and buyers who want a complete picture before their contingency deadline.
Frequently Asked Questions
What is the biggest red flag in a home inspection?
Structural issues top the list: foundation cracks that suggest movement, sagging rooflines, and water intrusion in the attic or crawl space. These problems are expensive to fix and often point to deeper issues. Electrical hazards like double-tapped breakers or outdated wiring also raise serious concerns. If a home inspection report flags any of these, get quotes from licensed contractors before you finalize your real estate transaction.
Do I need to clean my house before an inspection?
You do not need to deep-clean, but you should declutter. Clear access to the electrical panel, furnace, water heater, and attic hatch so the inspector can do a full property assessment. Move boxes away from walls in the garage and basement. A clean, organized home also makes a better impression if the buyer attends. Focus on access, not spotlessness.
Should I be present during the home inspection?
Buyers should attend the last 30 to 60 minutes to walk through findings with the qualified inspector. Sellers should step out. Being present lets you ask questions about the report and understand which items are safety hazards versus routine maintenance. If you cannot attend, ask for a detailed report with photos and a follow-up call. Advantage NC reports include documentation that supports the due diligence process.
What are the most common home inspection repairs sellers face?
Typical repairs include replacing furnace filters, re-caulking around tubs and windows, fixing leaky faucets, repairing damaged roof shingles, and correcting electrical issues like missing outlet covers. Smoke detectors and carbon monoxide detectors with dead batteries are also common findings. Many of these are inexpensive fixes you can handle before listing to avoid repair requests later.

Recent Comments